The first thing that had to be done
was to clear enough land in order to accomodate for the length of the
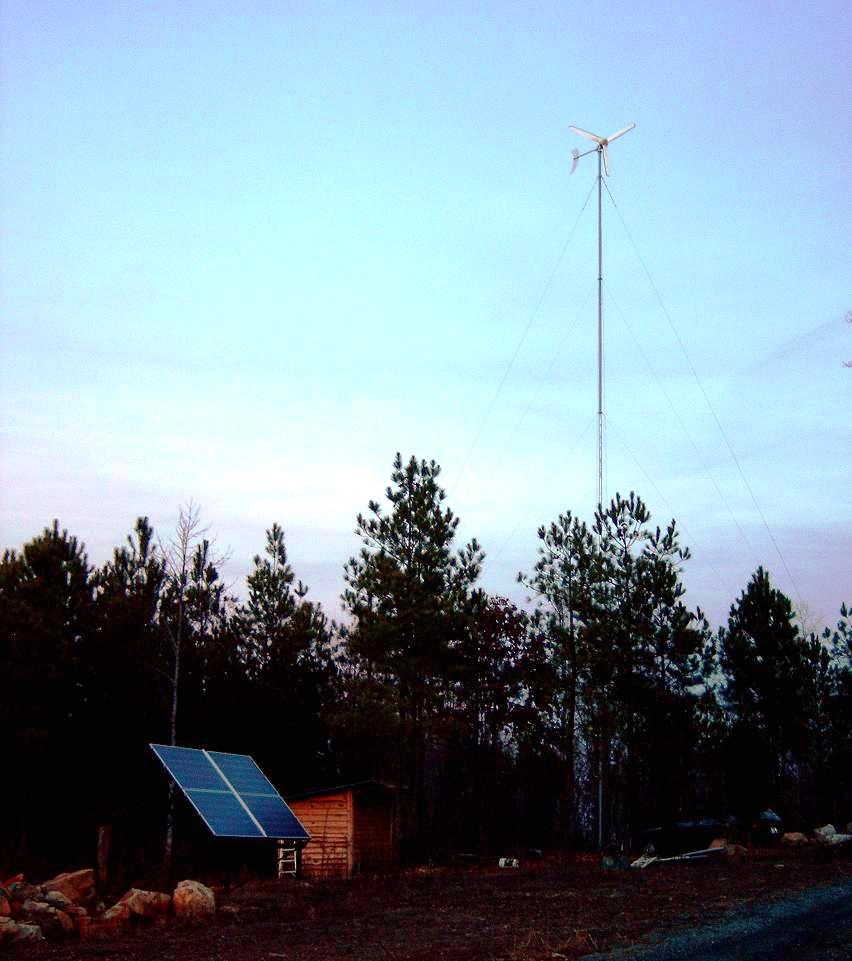
tower (106 feet tall) when it is laying down flat on the ground and
also the guy wires that are attached . I was fortunate enough to have a
father-in-law (
www.collinsmountaingrading.com)
who owns a small skidder and was able to clear all the trees out. I
ended up using alot of the trees to build what I call the power
station. I just used a framing hammer, nails, hatchet for debarking and
a chainsaw for cutting. With those tools I was able to frame the shack
up with no problem. As far as the roof of the shack, I used some tin
from Lowes and sheeter screws. The intersting thing about the tin is
that I got about a 60% discount on it. The reason was that the tin
looked like it had been left on the flatbed truck and in the rain for a
few days after delivery. It developed some sort of white scale all over
it making its appearace look bad and unsaleable. Turns out that Lowes
and other home improvement stores usually have a good bit of materials
that are damaged or can't be sold at full price. Ie scaly , rusty tin,
busted concrete bags, bent boards, cracked plywood, pressure
treatedwood, chiped concrete blocks etc. What I do now is whenever I am
Lowes, homedepot, etc, I ask them if they have any damaged building
materials they are trying to get rid of. Alot of times they are. If
this is the case I usually get anywhere from a 50 to 75 % discount on
these. You can ususally negotiate more when you tell them you want
it "all". Thats less work for them to have to move it, throuw it
away, load it back into the truck, etc... The twelve sheets of roofing
tin for the power station were bought for 7 bucks a sheet. Normally
they are $17 a sheet. I saved a bunch Of money that day. Also regarding
electrical wire at Lowes and others, if someone gets wire cut there and
then they just decide not to buy it, then this wire is usually sold at
1/2 price. Pretty sweet deal if they have what you happen to need at
the time. I always look around to see precut / taped up wire laying
around. If I need it I grab a lowes person and have them mark it down
50%. Thats their policy and my savings.
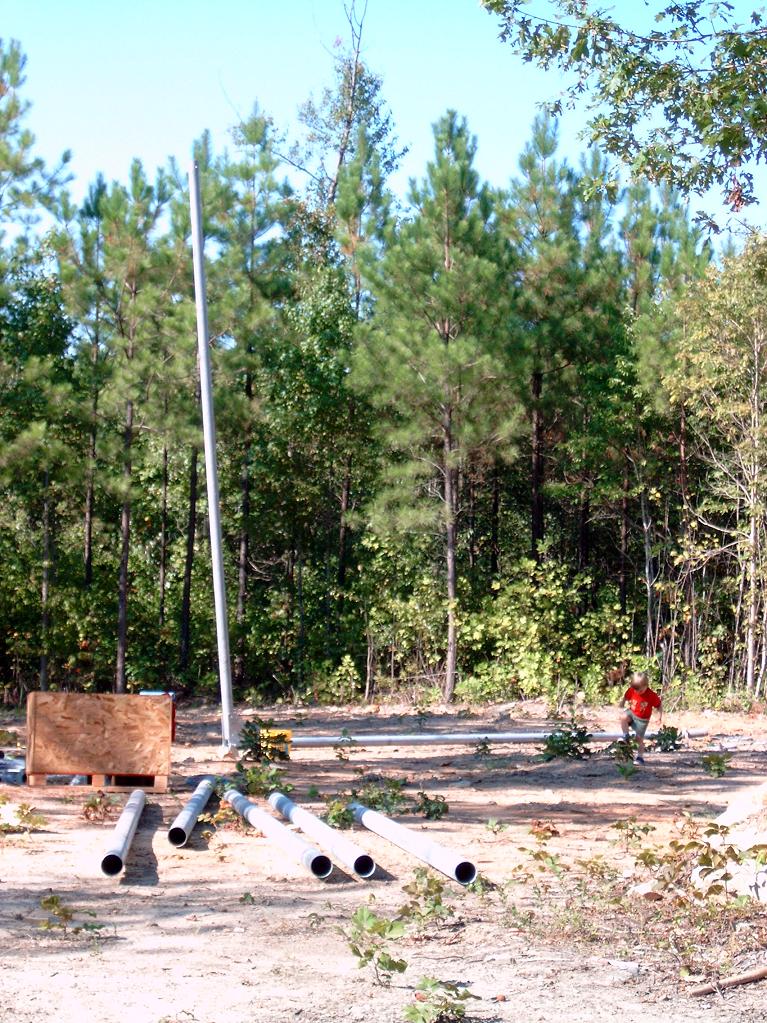
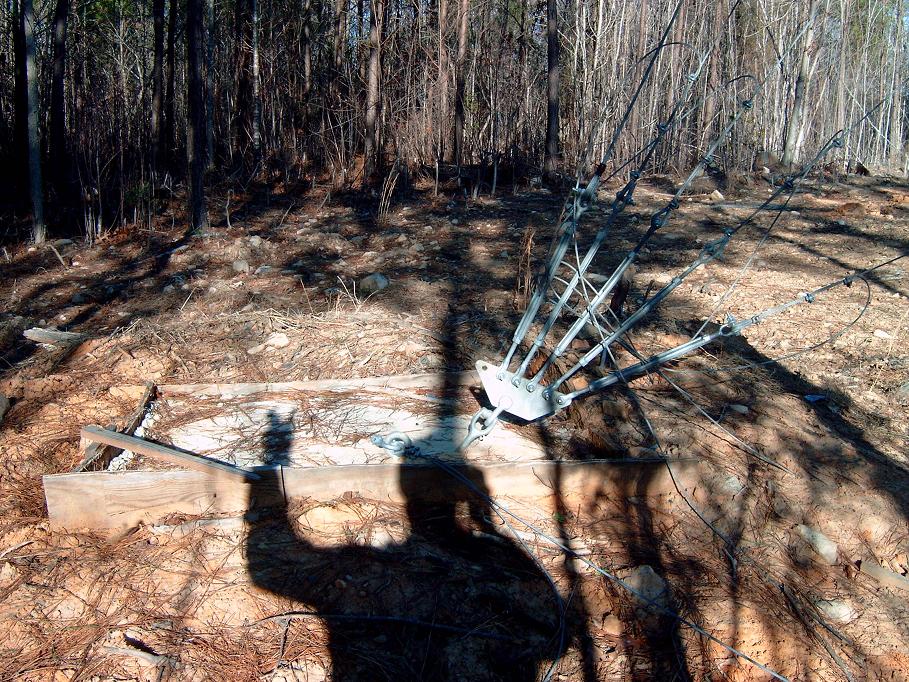
Once the land was cleared I had to lay out the
footers for the tower. There are 6 footers all together. One in the
middle to support the tower itself and 4 that surround the middle
footer for the 4 sets of turnbuckle assembly's that attach to each
section of pipe going up the tower. The tricky part was calculating how
much concrete to order. According to the A.R.E tower manual
the footers
needed to be 3 feet by 3 feet by 4 feet. To calculate the amount of
concrete to order I used a concrete calculator found at
http://www.concrete.com/calculatorsmaterials.htm#volume
You need to know how many yards to order so that you have
enough but you also want to be careful not to order too much because it
can be a waste of money (I ordered too much - oops) I ordered my
concrete from Pugh Concrete out of Silk Hope/Pittsboro North Carolina
(919) 542-0321. I ended up
ordering 12 yards of 4000 psi concrete at $108 dollars a yard plus
$5.50 a yard for fiber so really $113 a yard. Fiber is fiberglass
and they mix it in with the concrete and it makes it very strong. I
guestimated 12 yards because some of my footers were 4x4x5 and 3x4x4
and so forth which are larger than the recomended 3x3x4 in the A.R.E
manual. The concrete guy said said that there was about 3/4 of a yard
left in
the truck after we poured the six footers and was wondering what I
wanted to do with it. He offered to take it back to the office but said
I would not get any money back of course.
I had an idea. What if I just got some of those logs left over from
clearing out the land and build a square on a flat part of the ground
somewhere and have him pour the extra concrete right into the makeshift
form. Thats what we did and I took another board and pushed it right
down the middle to make 2 sections within the log square on the ground.
Now I have 2 squares of concrete about 6 feet by 3 feet by 8 inches. I
now
plan to use these two footers in the future to mount more solar panel
frames to. I guess it wasn't a waste of money after all. I'll need to
borrow a tractor or skidder to move them around of course.
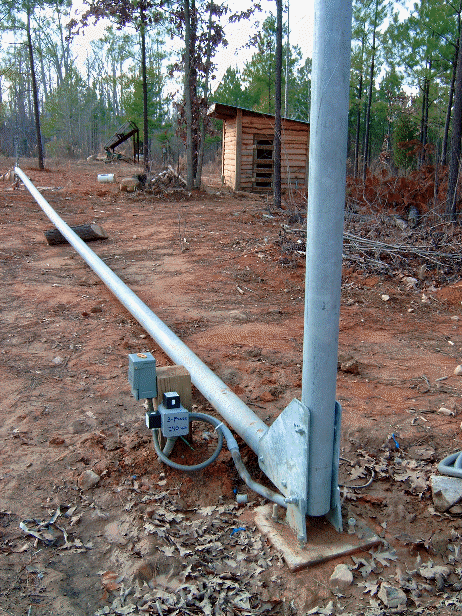
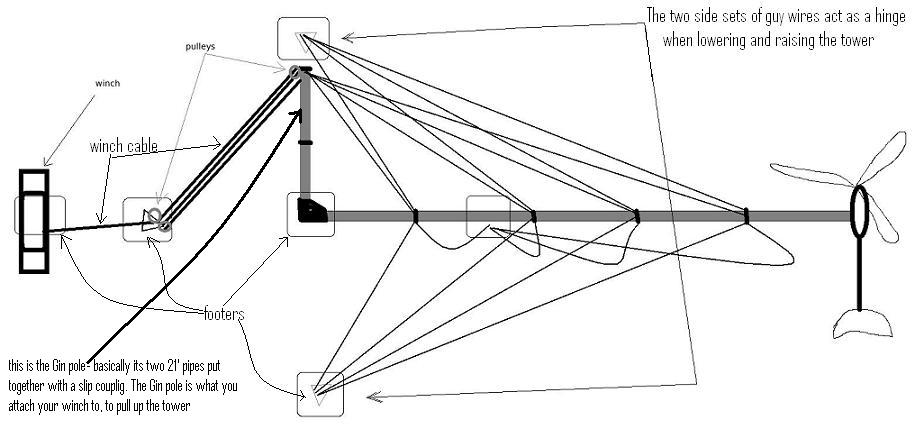
The sixth footer
is
for mounting the winch which is used to pull the
tower up via the gin pole (the shorter part of the L ) -- see drawing
below.
If you follow the manuals for the tower assembly and footer layout, it
is pretty self explanatory.
Here is a link to the Turbine Tower mechanical manual.
ARE110-48V_Owners_Manual_Mechanical_Ver5.0.pdf
For the footer layout, it was crucial that
we had a "transit level" so that we could make sure to build any
concrete forms
to the same height so that when we poured the concrete, the tops of the
footers would all be at the same elevation in relation to each other.
If the footers are not at the same height then lowering and raising the
tower would be harder to do since you could have one set of guy wires
on one side be shorter or longer than the other. These guy wires act as
the hinge for raising and lowering the tower.
 Rockriver.us